
HOME LAB RENEWAL - PT 4
So, Linux VMs imported fine - this is good. There was some wonkiness with the network adapters as HyperV names them different, so I had to adjust the netplans to match the new adapters. Next, I needed to install the guest agent which was easy enough, although not strictly required. I do a few things in my labs that require precise timings, so it was a reasonable add. Now on to my Windows boxen.
My Windows 11 VM was Bitlockered. That's a hard block. No amount of fidgeting with UEFI or recovery keys could unblock it. Fortunately, I had my USB drive and the HyperV host was still technically there - I had the forethought to use a DIFFERENT USB drive to install Proxmox on. So, I powered everything down, booted my HyperV host back up, imported the VM back in (directly off the USB drive this time) and logged into it for the slow...painfully slow...act of removing Bitlocker. It took about 6 hours but it just hummed away. Once that was done, I exported the VM again, made a spare copy onto the other USB drive, swapped back to Proxmox USB for the host and began again.
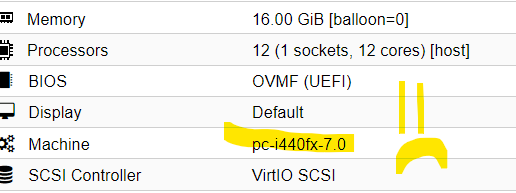
This time, the import succeeded and I was able to boot. And while I had to reactivate Windows (pft), I was able to re-enable Bitlocker on the VM, test a few boot scenarios to make sure it stuck (it did) and life was grand. But not really, cause the only way I could get that VM to work was with the old, legacy compute mode:
I spent a little bit of time trying to figure it out and finally just gave up. Knowing that wasn't going to do it for me, I resigned myself to a Win11 rebuild because of something coming up in my next installment. Screw it for now, it's running "as is." Now, let's build some TrueNas!
I spent quite a bit of time looking at the videos on YouTube (referenced channels in previous posts) on my setup and decided that while technically I could put Proxmox onto this new SuperMicro server and virtualize TrueNas by passing through the HBAs, I just didn't want to. I wanted to squeeze every last ounce of performance out of my recycled parts, plus the opportunity to play with TrueNas Scale was too much to resist, so, direct on hardware install (on a USB drive) it was.
The final setup looks a bit like this:
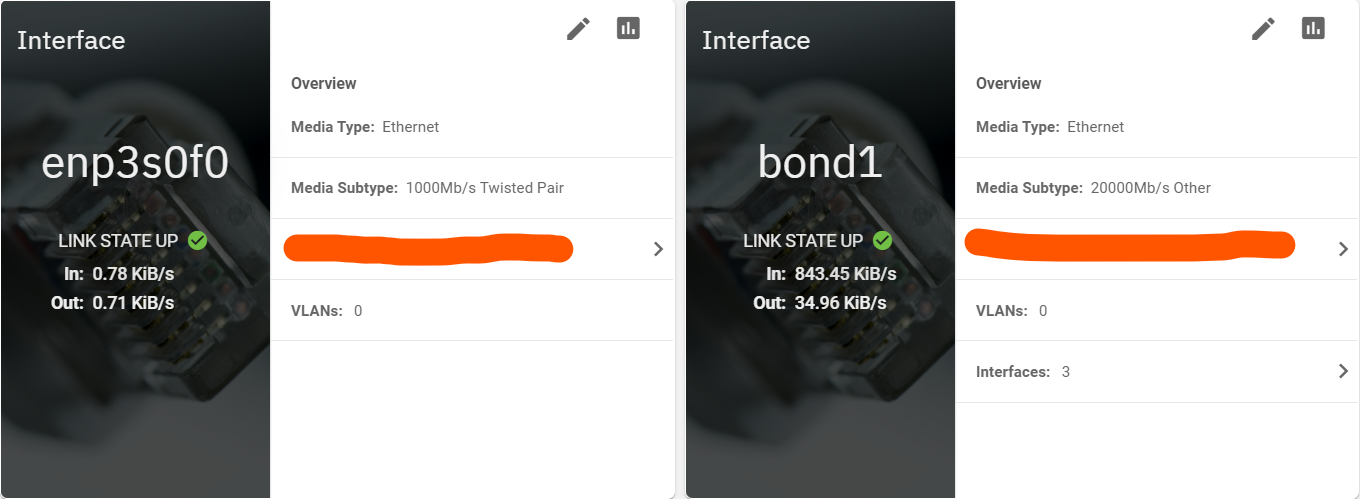
The network is two interfaces, one physical and one bonded. The bond, as previously described are two 10GBE ports crossover cabled direct onto the Proxmox box for a BLISTERING speed of 20GBE. Not that I could ever attain that - I tried in testing and could never break 10.5GBE - either CPU or disk bound - likely a bit of both.
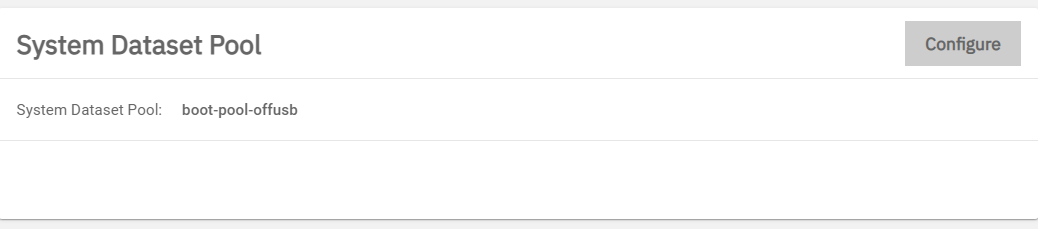
Next, I moved the System Dataset Pool off of the little USB drive I was using to save it from excessive wear. TrueNas logs a LOT of stuff and that was just gonna burn through the USB too fast, plus, as previously described, I have 3 x 512GB M.2's in the x8 PCIe slots. So, one of those 512GB M2.s went to dataset pool. Grotesque overkill, but meh.
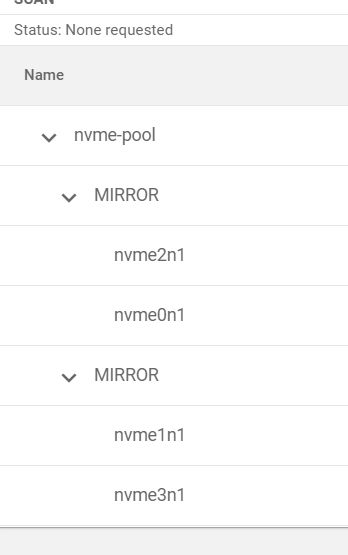
Next, I set up the NVME pool. For this I chose two datasets in mirror config. This should (and does) give me literally STUPID amounts of IOPS and bandwidth. It's freakishly fast - for random IO with fio from the Proxmox box, I am getting anywhere from 290MB/sec with 63K IOPs to bursts up well over 500MB/sec which is the literal max of these drives. Loss of half the space, but well worth it for pure speed. This is where the OS drives and a few of my DB drives go. Oh, and enable auto trim.
After that, I needed to create the HDD pool. Recall I purchased 20 IBM 960GB spinning metal for the slots I had. I had some initial fits with them showing up fine in BIOS but not in TrueNas. Recalling back to my college days, I remembered something about sector sizes...FFS these drives shipped with extended sector sizes (528) that go in like a storage array (although not the same sector size as like an EMC array) instead of 512. Whatever, I was able to reformat each drive and zero them out with sg_util --> I literally opened 20 SSH sessions into the TrueNas box and kicked em off over night (took about 6 hours) in parallel. Glad I didn't order like 14TB disks, that could have taken days!
Moving on, now I had 20 raw disks, how shall I configure my pool? There are so many different opinions and how to's on the matter, I finally settled on defining what I wanted to accomplish: Fast as I can make it, as much storage as I can get. To do that, I needed a bit of a 'special' config.
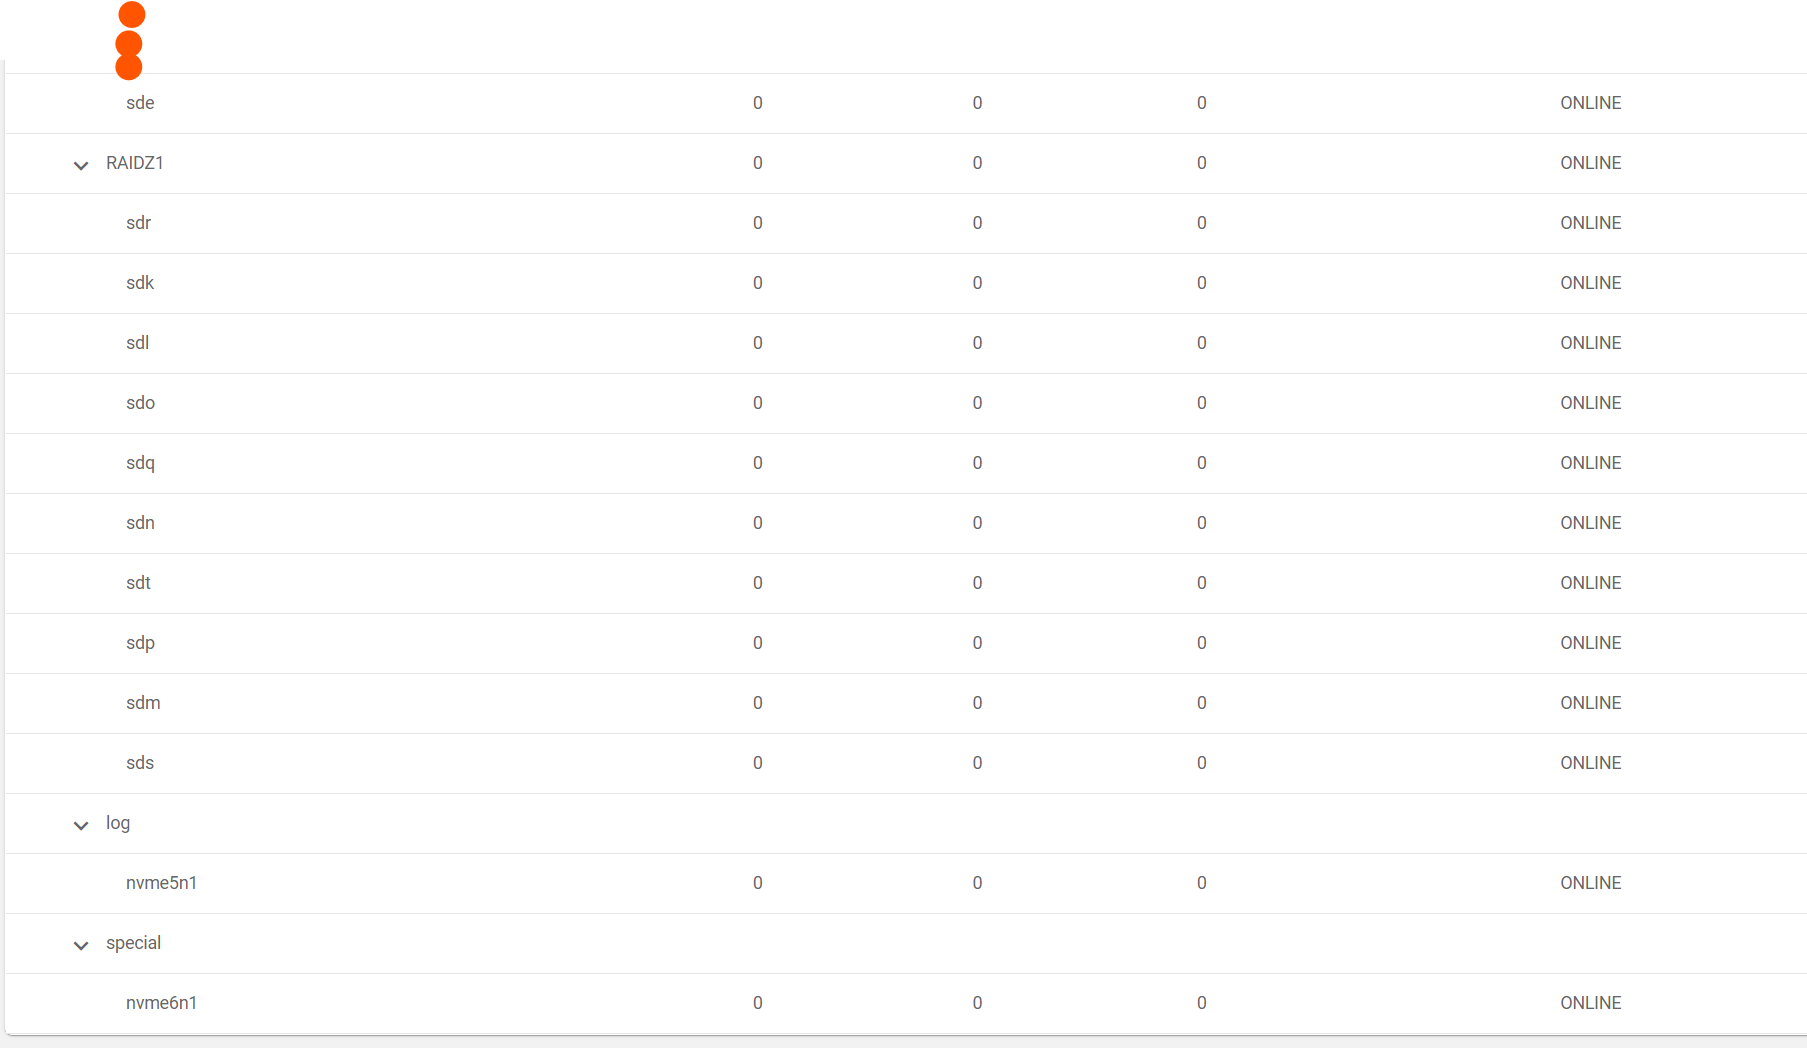
I went with two datasets of RAIDZ1, 10 disks each. I also chose to send intent log to the second of my three M.2's and finally set special to the third. It's TBD if the special was really necessary, my workloads so far don't use it, but it may. Also, with 128GB of RAM, the ZFS cache is saucy and smooth and really makes a great different on performance:
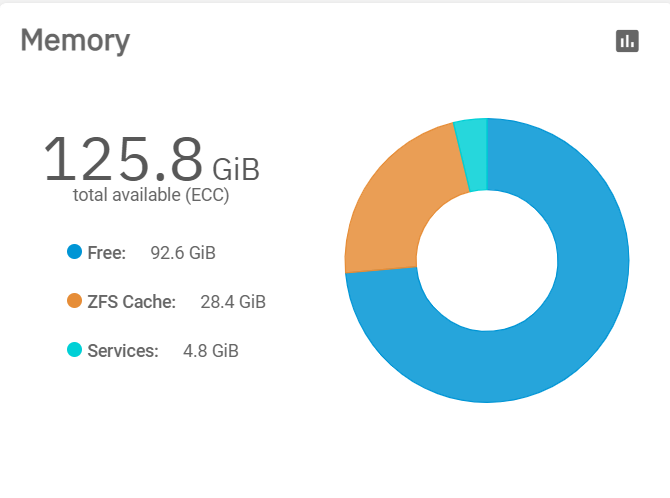
During my Read/Write tests of the HDD pool, ZFS went up to over 60GiB before it finally leveled off. Obviously, that pattern would change as different loads come and go, but essentially, I get both read and write caching into either memory (for read) or the M.2s (for write) to the slow spinning platters. This is the way.
Finally, I needed to set up my shares. Because these are literal direct crossover connections, I had little need for much in the way of security. I enabled NFS and presented them out to the Proxmox server.
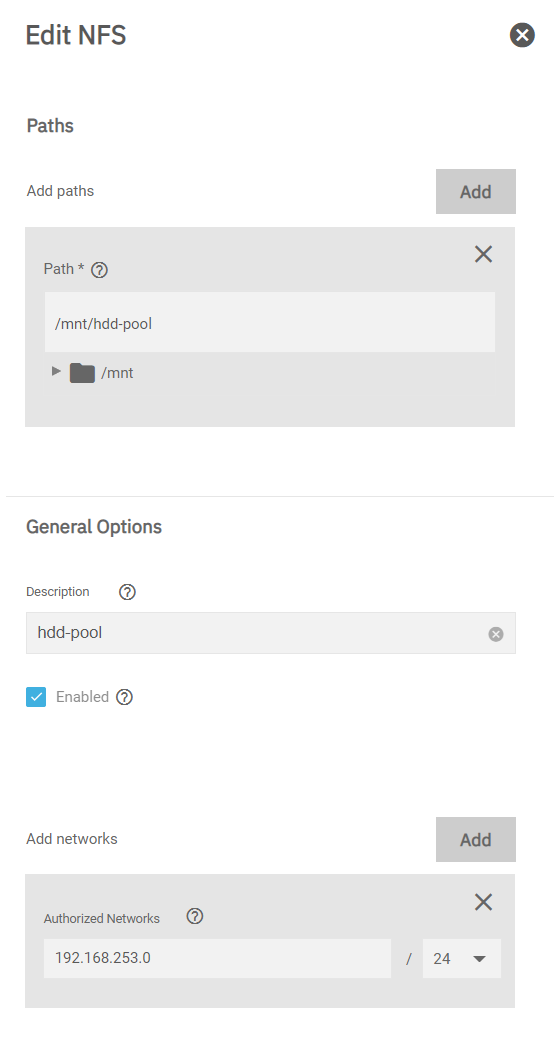
The authorized network you see above is the Proxmox host. Since it's the only NICs (bonded on both sides remember)? I just dropped the VLAN of those four directly connected NICs in and did a root:root map. There are far more secure ways of doing it, but I didn't care to go that route :)
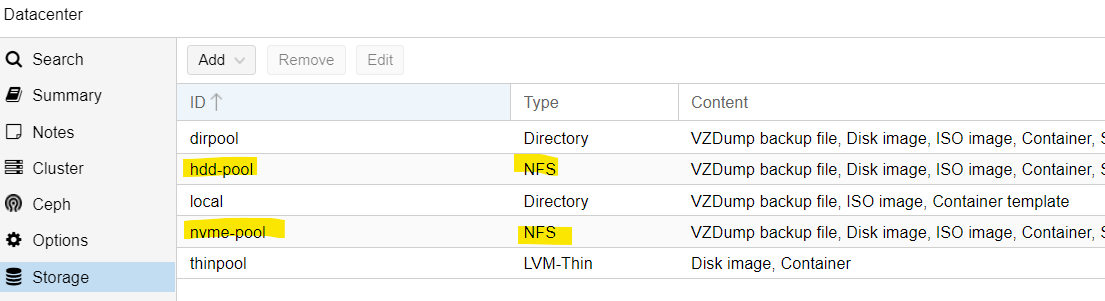
Finally finally, we now present those shares to Proxmox for all the use:
And then I simply powered off my VMs and do a storage migration to the TrueNas from the temporary M.2 from where they sat for importing. Done...and, might I also add...done! Except not really, cause now I need to rebuild my Win11 VM with some secret sauce. Next time dear friends.